Sunday, 25 September 2016

DIY Mind/Mindful Ja


Hello Everyone!
Today I'm going to be showing you how to make a mind jar. These are especially good for people that suffer with anxiety, it is a form of meditation that keeps your brain occupied when you are feeling stressed or anxious. The idea of this jar is that you shake it and all of the pieces of glitter are your stressed out mind and you then watch all the glitter settle at the bottom of the jar which helps to relax you and bring you back to your normal state of mind.

You Will Need:
-Glitter Glue (you can use clear pva glue but I didn't have any)
-Hot Water
-Jar
-Glitter
-Spoon
-Food Colouring (optional)

Step 1:
Fill up your jar half way with the hot water, the hot water will help the glitter glue (or pva glue) melt and combine with the other materials.


Step 2: Pour all of your glitter glue into the jar, you will need quite a lot to make sure that the glitter doesn't settle too quickly


Step 3: Stir all of your glitter until all have the lumps have disappeared, I loved how the blue, pink and purple glitter looked but the consistency wasn't thick enough so I had to add some red glitter which I don't like as much but oh well.


Step 4: Add some loose glitter to give the jar more sparkle, this will also help to thicken the consistency which will make the glitter settle a bit slower I am using Magpie Beauty's glitter which is actually for your nails but I love the colours so much that I threw a bit into the jar too.

Step 5:Stir the contents again and that's it, all you need to do now is put the lid on, shake and enjoy!

Thank you so much for reading, I hope you enjoyed, please feel free to comment below and share it would be much appreciated :) <3

Sunday, 18 September 2016

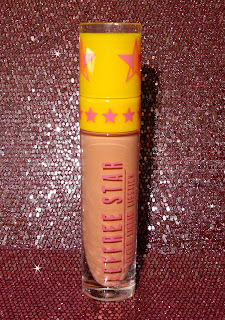
My Jeffree Star Products!


Hello Everyone!

Today I am going to be showing you my growing Jeffree Star products, I love these liquid lipsticks, they are so long lasting and feel nice to wear, not heavy on the lips at all! I don't have any where near all of the colours in the collection but I'm sure I will be buying more in the near future, I have extremely pale skin so these photos will give you some kind of idea how the colours look against pale skin because I haven't really seen these colours swatched on my kind of skin tone anywhere else. So lets get started!


1) Rich Blood
I Love this colour, it is one if my more recent purchases so I haven't worn it much yet but I can defiantly see me wearing it around Christmas time! The cool thing about this liquid lipstick is once it is applied you rub the surface once it had dried and it brings out the glitter that is within the product which is soon pretty!


2) Doll Parts
This is such a pretty pink, the photo isn't really doing it any justice but trust me this colour is a must have in anyone's makeup bag, I'm not sure why my lips look so wonky in some of these pictures, I must have been having an off lip day haha.


3)Gemini
This colour is defiantly my go to everyday lip colour, I wear this colour pretty much everyday because it matches any makeup and it lasts all day, even after I've eaten so I can throw it on before work, get home at the end of the day and the product hasn't budged!


4)Celebrity Skin
This colour is a kind of pinky browny nude colour, again the photo isn't doing it much justice but this was my go to shade before I got Gemini, this colour also matches anything and I think it compliments my one skin tone unlike some browny colours which can make you look even more pale.


5) Posh Spice
This shade is more or a pale greyish browny nude which I sometimes apply quite a bit of bronzer for when I want to wear it because it can sometimes (depending on the eyeshadow colours) wash me out, I would say this shade is very similar to Celebrity Skin just more ashy.


6) Breakfast at Tiffany's 
These next colours are defiantly some of my braver colours lol but I mostly bought these ones to wear as liquid eyeliner because you can also do that with 
these lip products which is amazing! This colour is an amazing bright sky blue colour ant it makes my blue eyes pop!


7)Blow Pony
I am in love with this colour, its the most pretty shade of purple I have ever seen! I don't think I would wear this as a lip product though because again it would wash me out but on the eyes is so beautiful.


8) I'm Royalty
This is such a deep sexy purple colour and looks amazing with everything! this colour makes my eyes pop too. Also these liquid lipsticks on the eyes work just like liquid eyeliner, it lasts forever and apply to evenly and smooth!


9)Queen Supreme
This colour is defiantly wearable on the lips however I prefer to wear this one on my eyes, if you would like to see how I apply these to my eyes and how they look on my eyes then leave a comment below telling me which colours you would like to see and I will make sure I do them.


10) Drug Lord
This is an amazing white colour obviously. I have never seen a white lip product ever! but again I don't wear this on my lips I wear it ob my eyes the only issue I have with this product is that sometimes it applies see through and streaky but its not a problem it just means I have to apply another layer of the product.


11) Watermelon Soda
These next 5 shades are from the summer collection and the look beautiful and oh my gosh they smell beautiful too! they smell just like a juicy sweet watermelon which literally makes my mouth water overtime I smell it haha. I think this is my favourite shade out of the five its a lovely deep pink.


12)(714)
This is a very pretty light pink colour it reminds me if a barbie doll I had when I was younger it. I find for me that one stroke on the lips with the wand and I'm good to go the colours are so pigmented its unreal. Unfortunately this one doesn't smell like watermelon.


13)Virginity
This shade might be one for the eyes, I haven't decided yet its a beautiful lavender colour but um not sure if the colour brings out my blue undertones in my pale skin and washes me out so I think I'll have to experiment with this colour a bit more.


14) Nude Beach
I am in love with this colour its a pretty light orange which is very summery, again not sure why my lips look wonky but oh well. This shade does smell like watermelon and just in case any of you were wondering I bought theses colours in the bundle a while back so I'm not sure if they are still available or not.


15)Queen Bee
I have absolutely no idea what I'm going to do with this shade, this was the only colour in the collection that i wasn't too sure on because yellow isn't really my colour but I'm sure ill figure something out haha.

And that was all of my Jeffree Star products I'm sure ill have more pretty shortly haha. Please feel free to leave a comment below and share it would be much appreciated :) <3

Sunday, 11 September 2016

Product I Regret Buying!


Hello my Lovelies, today I am going to be sharing with you a product that I regret buying and that product is called the "Easystr8" I bought this product around December 2015/January 2016, I bought it directly from the eaststr8 website and paid around £60 ish pounds for it. I was so excited to try it I thought it would save me so much time straightening my hair, but oh boy was I wrong. Every single time I've tried it, it has done absolutely nothing for my hair however I always gave it the benefit of the doubt and tried it again, I even looked up videos on youtube that show you how to use it, followed the instructions step by step and still nothing, I had even tried putting it to the highest heat setting and still nothing so, I have now come to the conclusion that it does not work. I don't know if its a faulty batch or whether the product just doesn't work on my particular hair but it did not work for me.


BEFORE

AFTER


As you can see the picture on the left is  before I used the "eaststr8" and on the right is the after picture and you can see there is barely any difference between the two pictures, my hair was still left frizzy and crinkly which is not the polka straight texture I like my hair to be which I can easily achieve with normal hair straighteners.


This is what the product looks like, just like a normal hairbrush but it has little prong in it that heat up and supposedly straighten your hair. Its also a pretty metallic pink.


One thing I didn't like was the fact that the little rubber blobs on the end of the bristles are so painful to brush through your hair because it snags and pulls, it also did rip quite a lot of my hair out which you might be able to see form the picture.


Another thing that I did not like and was actually kind of annoying was that the on/off button and the heat adjustment buttons are on the side of the brush where obviously your hand or your fingers will go, so when you are combing this through your hair it is very easy to change the settings or turn the brush off,  this happened to me numerous times.

Overall I could not get this product to work for me I have tried to use it so many times and still no results. I think this product was a really good idea but unfortunately doesn't work how it had been expected to so its back to the old faithful straighteners for me. Just a little disclaimer this is not me bashing or slandering the product creators I am simply just giving my opinions on how it worked for me, I'm sure some people love this products and works for them perfectly but this is just how I feel about it.

Thank you so much for reading, please feel free to comment and share it would be much appreciated :) <3


Sunday, 4 September 2016

Back to School Makeup!


Hello Everybody!

Today i am going to show you how i would do my makeup if i were going to be going back to school. I wore makeup very similar to this when i did go to school and it was so hard keeping all of the makeup to a minimum because in my school you were allowed to wear no makeup what so ever. obviously I'm not condoning wearing make up to your school if you're not allowed to but this is how i would have done mine.


So firstly you want to start with a foundation that is very similar to your natural skin tone as this is going to be the mail base of your make up, apply to all blemishes and under the eyes with a sponge. I am using the Real Techniques miracle complexion sponge and Collection Lasting perfection concealer in shade 1.


Secondly apply an extremely thin layer of foundation, again you want this to be as close as your natural skin tone you can get it because if there are streaks or that horrible line you get on your jawline if you don't blend properly then it will make it very obvious that you are wearing foundation,but if the colour matches your natural skin tone it will be very hard to see them. You also don't want the foundation to look cake just a little dewy. I am using the Real Techniques Buffing brush and Tarte Rain Forest of the Sea in the shade Light Sand.


Next is eyebrows, again use a very minimal amount just to define the shape more than to fill in, you still want to be able to see the hairs just so that it will look a lot more natural rather then bold and obvious. I am using eyeshadow on my eyebrow from the SmashBox Full Exposure eye pallet in the shade M1. Then you want to set the hairs in place and comb the product through the eyebrows just to make 100% sure that it look natural. I am using the Soap and Glory Archery brow pencil in the shade Brownie points.


 After this were going to move onto the eyes. With the eye make up or all of the make up in fact you want to steer completely clear of shimmery products because obviously that's not natural so were are going to go for matte very neutral tones, for the eyes I am using the Tartelette in Bloom pallet using the shade Flower Child and just applying this to the lid.


You then want to move onto the crease, for the crease colour you only want to use a shade slightly lighter than the lid colour just to add a bit of a shadow and definition but anything a lot darker will defiantly be more obvious so for my crease i used the shade Smarty Pants and blended it with a spectrum marble collection brush ( I'm not sure what the actual name of the brush is.) Make sure your crease is very well blended to ensure you have no harsh lines.


After this you are going to want to take some mascara and scrape all of the excess product off of the wand to that you don't apply too much and apply a very thin even coat just so they look darker not so that they look thicker. I am using Clinique High Impact Mascara.


Then you can apply some bronzer but only pick a shade a little bit darker than your skin toned only apply under the cheekbones and a tiny bit on the temples just to chisel your face a little bit and again make sure you blend extremely well. I am using the NYX Highlight and Contour Pallet in the shade Toffee/Caramel.


Almost finished, you should then take some matte pink blusher and very lightly rub onto your cheekbones making sure to tap the excess off of your brush, this is just to put a little bit of colour back into your face so again you really don't need to use much, you will also want to use a large brush for this to help your product go on more evenly. I am using the Smashbox blush in the shade Passion and the Real Techniques Bold Metals 103 brush.


Lastly is lips, with wearing lip products to school you want to completely stay away from lipsticks and instead go for a tinted lip balm, apply this with your finger so that the colour isn't too bright. I am using the Zoella Kissy Missy lip balm so not only will your lips look pretty but they will be kept moisturised.

And that's everything that i would put on my face for school, i really hope you found this useful. Please feel free to leave a comment or share with your friends it would be much appreciated. Thank you so much for reading :)